
Summary
The single dental implant procedure is a meticulous process that offers a permanent, durable, and aesthetically pleasing solution for replacing a missing tooth.
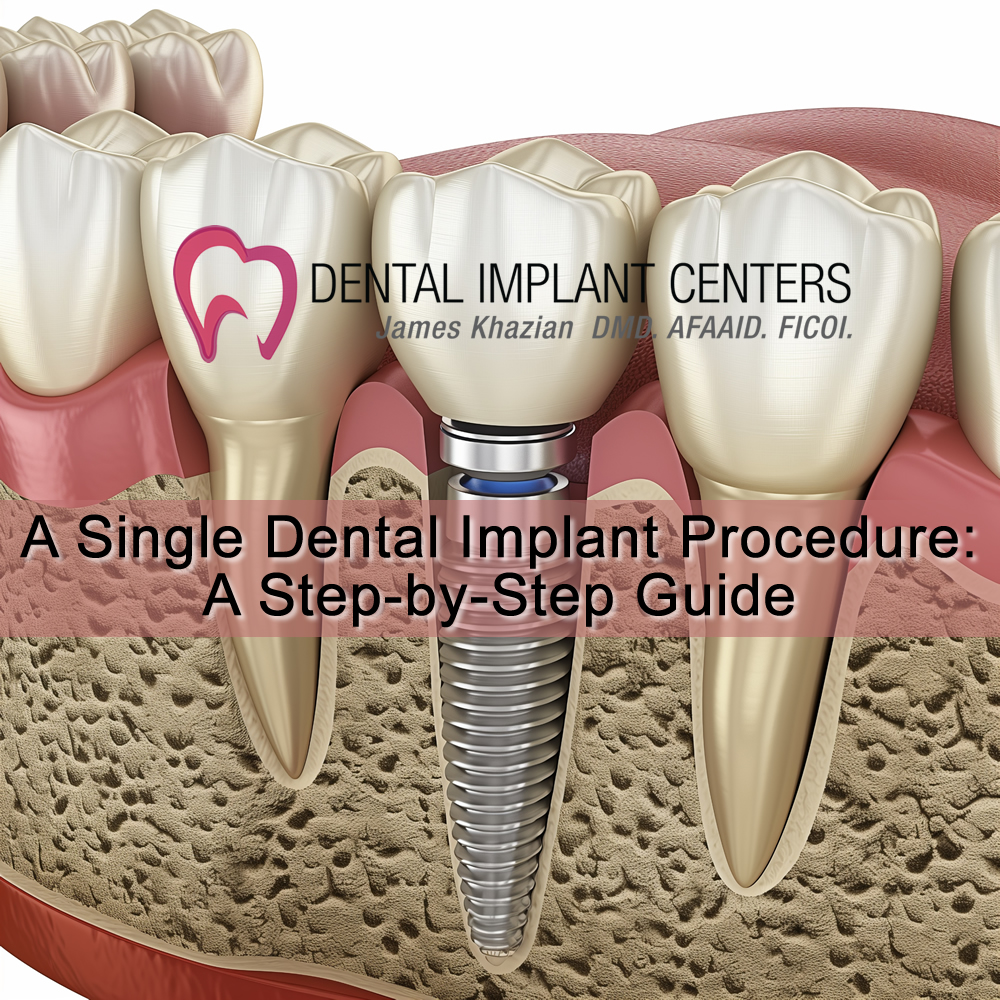
A Single Dental Implant Procedure: A Step-by-Step Guide
A single dental implant is one of the most reliable and long-lasting solutions for replacing a missing tooth. Unlike other tooth replacement options like dentures or bridges, a dental implant is designed to integrate with your jawbone, providing a permanent solution that looks, feels, and functions just like a natural tooth. The process of getting a single dental implant involves multiple stages, each crucial for the success of the implant. In this article, we’ll explore the step-by-step procedure for receiving a single dental implant, explaining what you can expect during the process.
What Is a Dental Implant?
A dental implant is a titanium post that acts as an artificial tooth root. It is surgically placed into the jawbone, where it fuses with the bone through a process called osseointegration. This fusion provides a solid foundation for the prosthetic tooth, ensuring stability and durability. The implant is designed to support a custom-made dental crown that replaces the missing tooth, offering a natural look and feel.
Step 1: Initial Consultation and Evaluation
The first step in the single dental implant process is a comprehensive evaluation by your dentist or oral surgeon. During this initial consultation, your dentist will review your medical and dental history, take X-rays or a 3D scan of your jaw, and assess the condition of your oral health. This evaluation is crucial for determining whether you are a suitable candidate for a dental implant.
Some key factors that are considered during the consultation include:
- Bone density: The implant needs a sufficient amount of bone to anchor securely. If you have insufficient bone density, a bone graft may be necessary.
- Gum health: Healthy gums are essential for supporting the implant. Any existing gum disease must be treated before proceeding with the implant.
- Overall health: Chronic health conditions such as diabetes or smoking habits can affect the healing process.
Once your dentist confirms that you are a good candidate, a customized treatment plan is created, outlining the steps of the implant process.
Step 2: Tooth Extraction (If Necessary)
If the missing tooth is still in place but damaged or decayed, the next step is to extract the tooth. This is a minor surgical procedure that is typically done under local anesthesia to minimize discomfort. Once the tooth is removed, the dentist may decide to place the implant immediately or wait for the extraction site to heal, depending on your individual case.
In cases where immediate implant placement is not possible, your dentist may advise waiting for a few months to allow the gums and bone to heal fully before moving forward with the implant procedure.
Step 3: Placement of the Dental Implant
Once the site is ready, the actual implant procedure begins. This involves surgically placing the titanium implant into the jawbone where the tooth root used to be. Here’s what happens during the procedure:
- Local Anesthesia: The dentist will administer local anesthesia to numb the area, ensuring that you won’t feel any pain during the surgery.
- Incision and Drilling: A small incision is made in the gum tissue to expose the jawbone. Using specialized instruments, the dentist will drill a small hole in the bone to accommodate the implant.
- Implant Insertion: The titanium implant is carefully inserted into the hole, and the gum tissue is stitched closed over the implant. This post will serve as the foundation for the future crown.
Step 4: Osseointegration – Healing and Bonding
After the implant is placed, a process known as osseointegration begins. This is the most critical phase of the dental implant procedure, where the implant fuses with the surrounding jawbone. Osseointegration typically takes several months, usually between 3 to 6 months, depending on the patient’s healing capacity and bone quality.
During this period, it’s important to avoid placing undue stress on the implant site. Your dentist will give you instructions on how to care for your gums and implant during the healing process to ensure that osseointegration occurs successfully.
Step 5: Placement of the Abutment
Once osseointegration is complete and the implant has fused with the bone, the next step is the placement of the abutment. The abutment is a small connector that attaches to the implant and extends above the gumline. It will hold the dental crown in place.
The placement of the abutment requires a minor surgical procedure. The dentist will reopen the gum tissue to expose the implant and attach the abutment. The gums are then stitched around the abutment to ensure proper healing. The gums will take a few weeks to heal around the abutment before the final crown is placed.
Step 6: Impressions for the Custom Crown
Once the gums have healed around the abutment, the dentist will take an impression of your mouth. This impression is used to create a custom-made dental crown that matches the size, shape, and color of your natural teeth. The goal is to ensure that the crown fits seamlessly with the rest of your smile, providing a natural look and feel.
During this stage, your dentist may place a temporary crown over the abutment while the permanent crown is being fabricated. The temporary crown allows you to maintain normal function and appearance while you wait for your final restoration.
Step 7: Placement of the Final Crown
The final step of the single dental implant process is the placement of the permanent crown. Once the custom crown is ready, it is securely attached to the abutment using dental cement or a small screw. Your dentist will ensure that the crown fits properly, is comfortable, and blends with your natural teeth.
At this point, your dental implant is fully functional, and you can eat, speak, and smile confidently. The implant will feel and function just like a natural tooth, providing long-term stability and comfort.
Step 8: Post-Procedure Care and Maintenance
After the procedure, proper care is essential to ensure the longevity of your dental implant. Good oral hygiene practices, such as brushing twice a day, flossing daily, and regular dental check-ups, are critical for maintaining the health of your implant. Your dentist may also recommend using special tools, like interdental brushes, to clean around the implant and prevent plaque buildup.
With proper care, a dental implant can last a lifetime, making it one of the most effective solutions for replacing a missing tooth.
Conclusion: A Long-Lasting Solution for Tooth Replacement
The single dental implant procedure is a meticulous process that offers a permanent, durable, and aesthetically pleasing solution for replacing a missing tooth. From the initial consultation to the final placement of the crown, each step is carefully executed to ensure the best possible outcome. By understanding the process and working closely with your dentist, you can achieve a restored smile that looks, feels, and functions just like your natural teeth.